TL;DR;
Running the gcloud command from inside a docker container, we will get
an Access Token that we’ll use to push a docker image to a private bucket
inside our Google Cloud Registry. The image will contain the site
https://www.cursodegit.com.
Creating the docker image
In this post, we want to create a docker image that will be used to serve the website https://www.cursodegit.com. The repository for this website can be found here.
Getting into the details about how that docker image is built, is out of the scope of this post. I want to keep focus on how to push the image and not on how it’s build.
To build the image, we’ll just follow the README file in the public website’s repository. We run the following commands:
> git clone https://github.com/cursodegit/web.git
> make build
This sequence of commands will create a docker image in our local computer tagged as
eu.gcr.io/web-cursodegit-com/web. We want to push that image to a private bucket
inside the Google Container Registry.
Using gcloud inside docker
Once the image is built, we need to make our local docker client
log in into the Google Container Registry. To do that, we need to run the gcloud
command provided by the Google Cloud SDK several times with different options and
sub commands.
The recommended way of running the gcloud command
is to install the SDK locally. However, being committed to use docker as much as
possible, we will run the gcloud command from inside a docker container.
Fortunately, Google provides a public docker image with different versions of the SDK,
so we will just follow the documentation.
Since we don’t need additional components, we can just use the standard image from google:
> docker pull gcr.io/google.com/cloudsdktool/cloud-sdk:latest
Once we have downloaded the image, we will log in into Google Cloud. Run the following command (again, we are just following the docs here):
% docker run -ti \
    --name gcloud-config \
    gcr.io/google.com/cloudsdktool/cloud-sdk \
    gcloud auth login

Go to the following link in your browser:

    https://accounts.google.com/o/oauth2/auth?response_type=code&(very long URL here)&code_challenge_method=S256

Enter verification code:
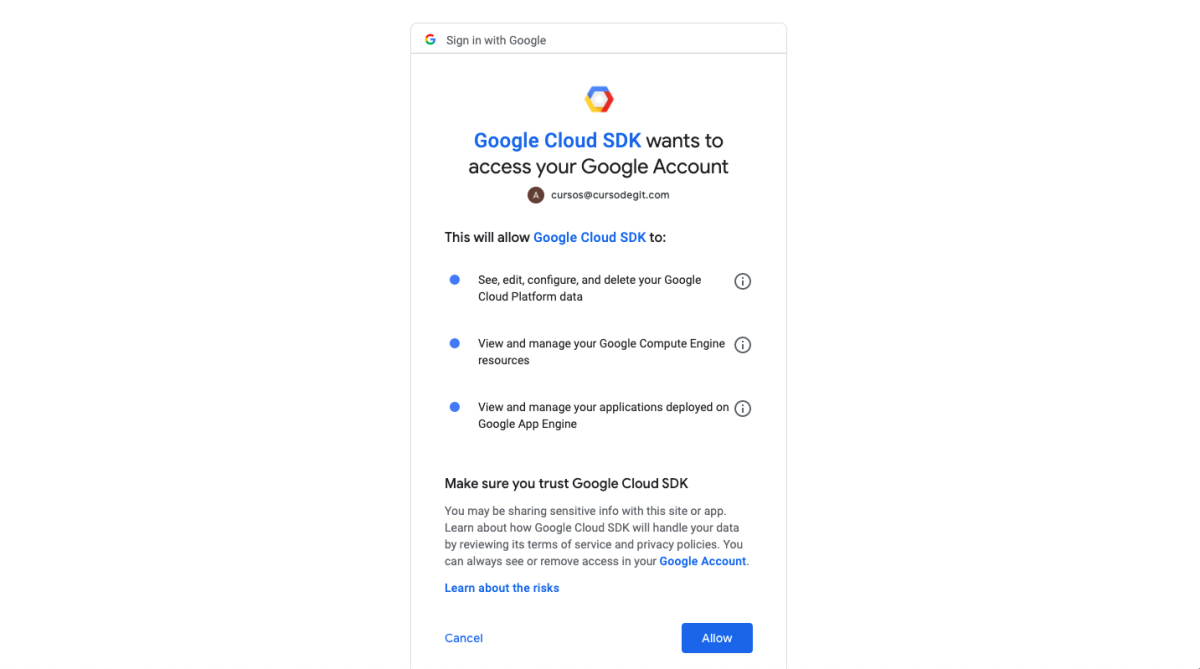
It will open a browser window to authenticate you. If the browser window doesn’t open automatically, we will open one ourselves and copy and paste the URL provided by the previous command:

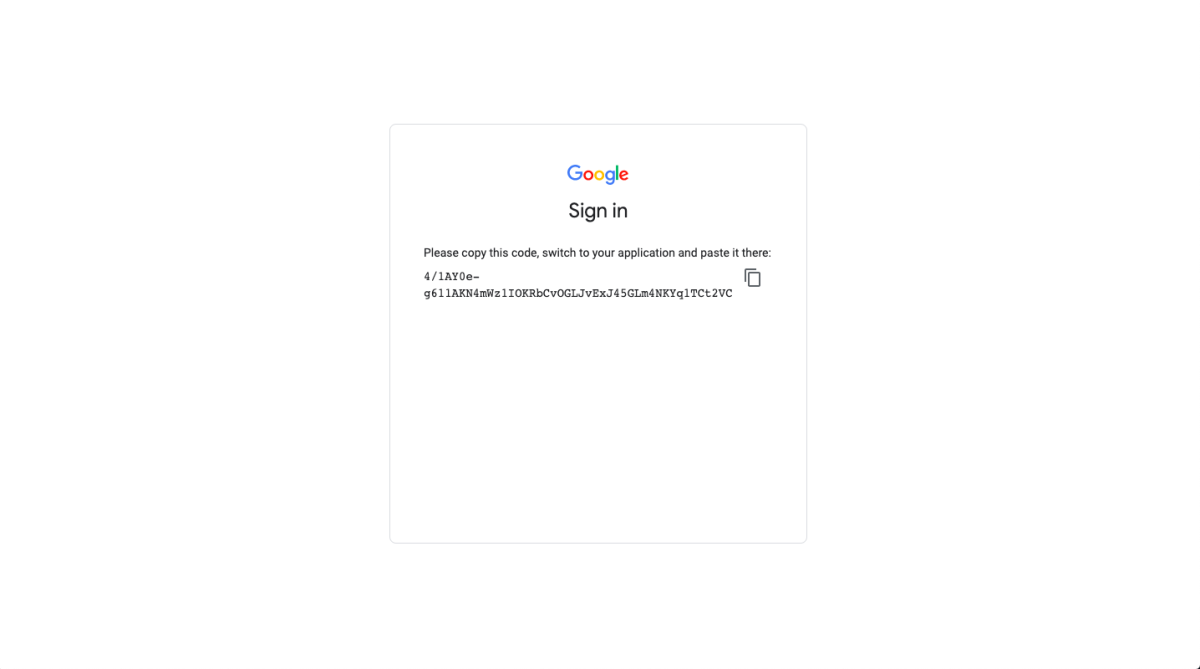
As you can see, we are granting access to the Google Cloud SDK to perform some actions in our Google Cloud account. We click on the “Allow” button. In the next screen we will see a code:

We copy and paste the code in the CLI and press enter:
% docker run -ti --name gcloud-config gcr.io/google.com/cloudsdktool/cloud-sdk gcloud auth login
Go to the following link in your browser:

    https://accounts.google.com/o/oauth2/auth?response_type=code&(very long URL here)&code_challenge_method=S256

Enter verification code: 4/1AY0e-g611AKN4mWz1IOKRbCvOGLJvExJ45GLm4NKYq1TCt2VCDufBtzc_Zs

You are now logged in as [[email protected]].
Your current project is [None].  You can change this setting by running:
  $ gcloud config set project PROJECT_ID
As shown above, we should see a message telling us that we have successfully logged in.
This command will also create a container named gcloud-config with a volume that will
persist the authentication and configuration data we just set up. We will use this container later:
Every gcloud command that we run from now on, will use this container.
For this reason, please note that we didn’t use the option --rm: the container gcloud-config should not
be deleted after running the command.
To try that everything is working, we will get the list of projects:
% docker run --rm \
  --volumes-from gcloud-config \
  gcr.io/google.com/cloudsdktool/cloud-sdk \
  gcloud projects list

PROJECT_ID          NAME                PROJECT_NUMBER
web-cursodegit-com  web-cursodegit-com  XXXXXXXXXXXX
As I mentioned before, we are using the authentication and configuration data that we
created above. It was stored in the container that we named as gloud-config, and we are accessing it using the
option --volumes-from gcloud-config. With this option, we mount the volumes from the container named
gcloud-config into the container running the gcloud command.
Should you ever need to reset the authentication or the configuration, just remove the container glcoud-config and recreate it
using the command that we fun before.
Enable the container registry API
Once we are authenticated, we can start our journey. The first step will be to
activate the container registry API.
We will use the following command to do that:
> % docker run -ti --rm \
    --volumes-from gcloud-config
    gcr.io/google.com/cloudsdktool/cloud-sdk
    gcloud services enable containerregistry.googleapis.com --project web-cursodegit-com

Operation "operations/acf.p2-499154617149-9c239f4d-735f-4309-bf41-ec190d91a768" finished successfully.
If this API is not enabled for this project, we will not be able to push our images later.
Authentication to access the private registry.
The next thing we need to do before pushing our image is to log in our docker client into the google container registry. Let’s do that!
According to the documentation,
the recommended way to log in into the private registry is to configure docker to use the
gcloud credential helper.
This is what we would do if we had installed the Google Cloud SDK directly in our computer. Since we’re running gcloud
from inside a docker container, our local docker commands don’t have access to the gcloud command because it’s not
actually installed in our computer, and therefore, it won’t work.
For this reason we will use one of the alternative methods. In particular, we will use the Access Token method
In this method, we create a service account and use that service account to get a temporary access token that will allow us to push and pull images from the docker registry.
Let’s create the service account:
> docker run -ti --rm \
    --volumes-from gcloud-config  \
    gcr.io/google.com/cloudsdktool/cloud-sdk
    gcloud iam service-accounts create container-registry-read-write --project web-cursodegit-com
Once created, we will check that the account is there:
> docker run -ti --rm \
    --volumes-from gcloud-config
    gcr.io/google.com/cloudsdktool/cloud-sdk
    gcloud iam service-accounts list --project web-cursodegit-com

DISPLAY NAME                            EMAIL                                                                     DISABLED
                                        container-registry-read-write@web-cursodegit-com.iam.gserviceaccount.com  False
Compute Engine default service account  [email protected]                        False
Once the account is created, we need to grant the service account with
the right permissions to push and pull docker images.
Looking at the permissions shown in the previous link, we need to assign the role
Storage Admin to our service account, let’s do that:
% docker run -ti --rm \
    --volumes-from gcloud-config  gcr.io/google.com/cloudsdktool/cloud-sdk \
    gcloud projects add-iam-policy-binding web-cursodegit-com \
    --member "serviceAccount:container-registry-read-write@web-cursodegit-com.iam.gserviceaccount.com" \
    --role "roles/storage.admin"

Updated IAM policy for project [web-cursodegit-com].
bindings:
- members:
  - serviceAccount:[email protected]
  role: roles/compute.serviceAgent
- members:
  - serviceAccount:[email protected]
  - serviceAccount:[email protected]
  role: roles/editor
- members:
  - serviceAccount:[email protected]
  role: roles/firebaserules.system
- members:
  - user:[email protected]
  role: roles/owner
- members:
  - serviceAccount:container-registry-read-write@web-cursodegit-com.iam.gserviceaccount.com
  role: roles/storage.admin
etag: BwXELvWeR0c=
version: 1
Why did we chose “Storage Admin” and not “Storage Object Admin”? The container registry stores the images and it’s layers in a bucket.
That bucket is created the first time we push the image and, therefore, we need to have the necessary permissions to
create it. The “Storage Admin” role has the permission storage.buckets.create, which is the one we need.
Once the service account is in place, we need to create a key associated with the service account:
% docker run -ti --rm \
    --volumes-from gcloud-config
    -v $(pwd):/workdir
    gcr.io/google.com/cloudsdktool/cloud-sdk
    gcloud iam service-accounts keys create /workdir/keyfile.json
    --iam-account container-registry-read-write@web-cursodegit-com.iam.gserviceaccount.com

created key [aaabcc588a41fba3b3966ca450c78e6f89b000d0] of type [json] as [keyfile.json] for [container-registry-read-write@web-cursodegit-com.iam.gserviceaccount.com]
The command gcloud iam service-accounts keys create /workdir/keyfile.json stores the key in the file
/workdir/keyfile.json inside the container.
We use a bind volume (see the argument -v $(pwd):/workdir) to mount our local working directory in the /workdir folder
inside the container running the command. Doing this, we will persist the file keyfile.json
in the local file system of our computer, and we will be able to use it later.
We need to store this key. We should encrypt it and store it in our repository, keep it in a vault or add it as secret to our CI/CD system. We’ll need this file in the future any time we want to log in into the Google Container Registry.
Get the token and log in
The access Token method that we are going to user works as follows:
- We authenticate into Google Cloud using the service account and the file
keyfile.json - We request a token
- We use the token to log in our docker client into the Google Cloud Registry
As I mentioned before, you will need the file keyfile.json every time we need to log in, se we need to find a
secure way to store it.
Authenticate using the service account:
% docker run -ti --rm \
  --volumes-from gcloud-config
  -v $(pwd):/workdir
  gcr.io/google.com/cloudsdktool/cloud-sdk gcloud auth activate-service-account container-registry-read-write@web-cursodegit-com.iam.gserviceaccount.com
  --key-file=/workdir/keyfile.json

Activated service account credentials for: [container-registry-read-write@web-cursodegit-com.iam.gserviceaccount.com]
We use the option -v $(pwd):/workdir to mount our local working directory (which contains the keyfile.json file)
inside the container’s /workdir directory.
Get the access token
> docker run -ti --rm \
    --volumes-from gcloud-config
    gcr.io/google.com/cloudsdktool/cloud-sdk gcloud auth print-access-token
ya29.c.KqYBAghugIeM...TgNAMFmLJDmOzG8A
Log in docker into the Google Container Registry
> echo "ya29.c.KqYBAghugIeM...TgNAMFmLJDmOzG8A"  | docker login -u oauth2accesstoken --password-stdin https://eu.gcr.io
Login Succeeded
Note: if your docker version doesn’t support the –password-stdin option, you can run this command instead
> docker login -u oauth2accesstoken -p "ya29.c.KqYBAghugIeM...TgNAMFmLJDmOzG8A" https://eu.gcr.io
Login Succeeded
Push the image
Finally!!! Now we should be able to push:
% docker push eu.gcr.io/web-cursodegit-com/web
Using default tag: latest
The push refers to repository [eu.gcr.io/web-cursodegit-com/web]
12a2db8368f0: Pushed
4689e8eca613: Layer already exists
3480549413ea: Layer already exists
3c369314e003: Layer already exists
4531e200ac8d: Layer already exists
ed3fe3f2b59f: Layer already exists
b2d5eeeaba3a: Layer already exists
latest: digest: sha256:89238ac5b9c01e77d3839abf1784c773cd7e383d4bca4146e21fdfe1fbdc7e6b size: 1780
That’s it. We had to run a lot of long commands to get here, but we did it!
Conclusions
- If we run the Google Cloud SDK inside docker containers, we cannot use the Google Credentials Helper to log in our docker client into the Google Container Registry.
- We need to use a different authentication method, which requires running more commands.
- Also, we need to have a very clear understanding of how volumes and bind volumes work in docker to be able to get the files in and out of the containers.
-
We need to type longer commands than those needed if we had installed the Google Cloud SDK locally. However, we could easily reduce the verbosity of the commands by creating a simple bash wrapper script called
docker.shwith this code:#!/usr/bin/env bash # docker.sh file docker run -ti --rm \ --volumes-from gcloud-config \ -v $(pwd):/workdir \ gcr.io/google.com/cloudsdktool/cloud-sdk "$@"Once the script is in place, we could run:
> ./docker.sh gcloud projects list
> ./docker.sh gcloud auth activate-service-account container-registry-read-write@web-cursodegit-com.iam.gserviceaccount.com \
    --key-file=/workdir/keyfile.json
> ./docker.sh gcloud auth print-access-token
which will substantially reduce the length of the commands we need to type. We could define an alias instead of a shell script.
And this is all for today. I hope you find it usefull.


